Career Tracker
What it is?
- It's a GLCC module that enables you to define a list of to-do items for students to follow and complete
- It enables you to define templates of organized tasks for different student populations
- It provides Advisors/Coaches with a view into a student's progress
- It's automatically integrated with other GLCC entities, e.g., Job applications, Advising Appointments, Workshops, Interviews, etc.
How Career Tracker is named is entirely up to you. Use whatever label is suitable for your business case: Syllabus, Roadmap, Checklist, etc. You have the same naming flexibility in labeling your population: Student, Candidate, Intern, Apprentice, Member, etc.
As an admin, you can create task templates and assign tasks and due dates for defined student sets.
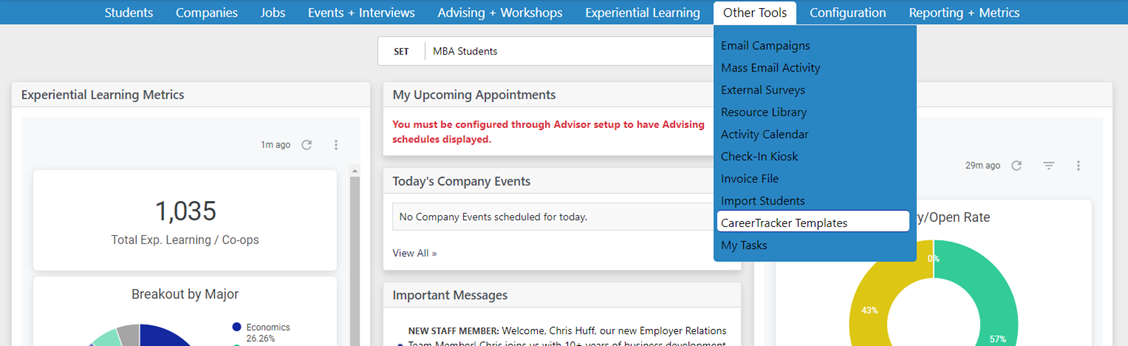
To create a new template, use the menu to go to Other Activities > CareerTracker Admin Templates
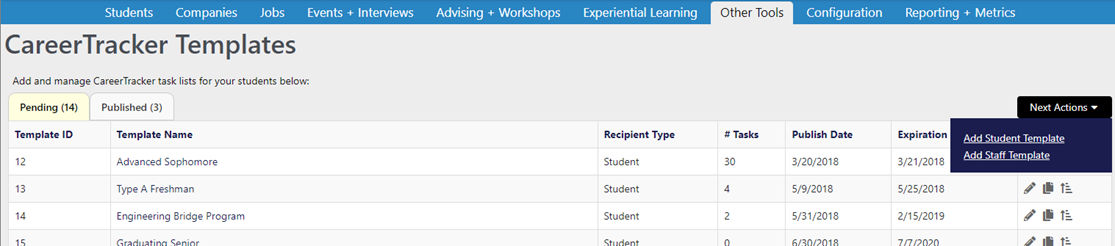
Click Next Actions > Add New Student Template
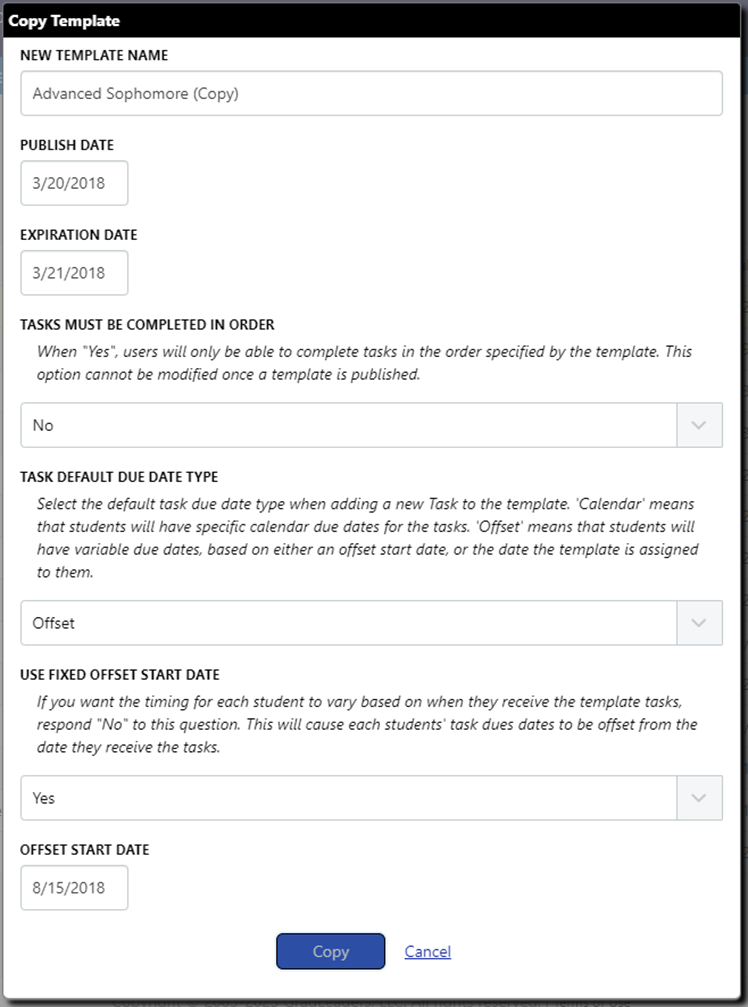
Give the template a name, a publish date, an expiration date, and decide whether tasks must be completed in order. You have several options related to due dates for the template's tasks:
- A Calendar Due Date publishes a task on a set calendar day
- An Offset Due Date schedules a task to be published a set amount of time after a) the student receives the template (generally, upon their first login)
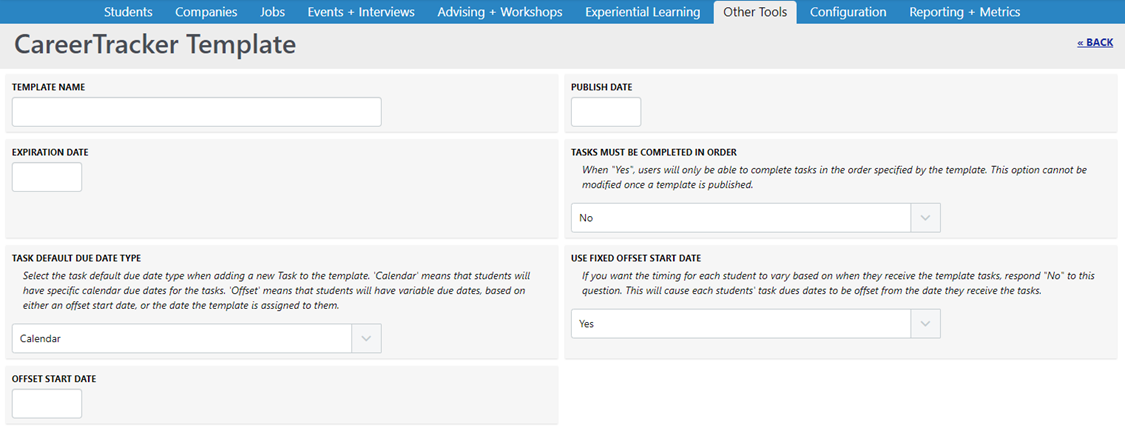
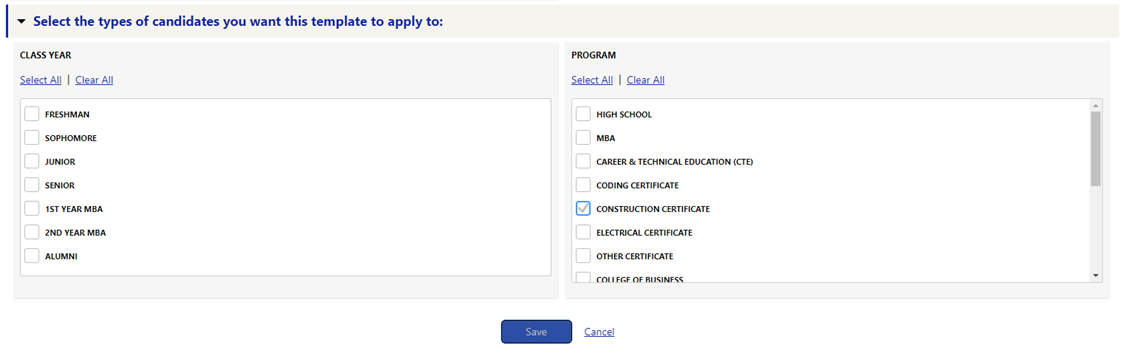
Select the students you'd like to be able to see this template then Save. You can make a selection as granular or as general as you desire. Save the template.
After you save, you'll be redirected to a page where you can edit and modify your template.
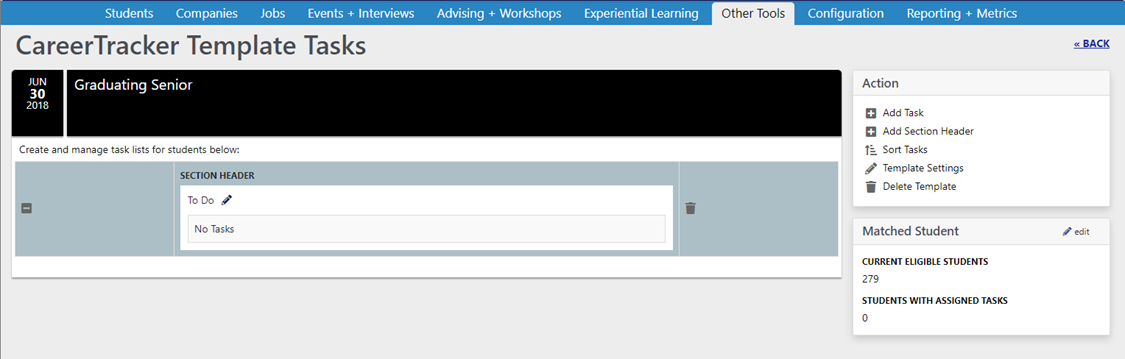
Click the Section Header to edit the section's name, color, HTML instruction text, and HTML completion text, and then Save.
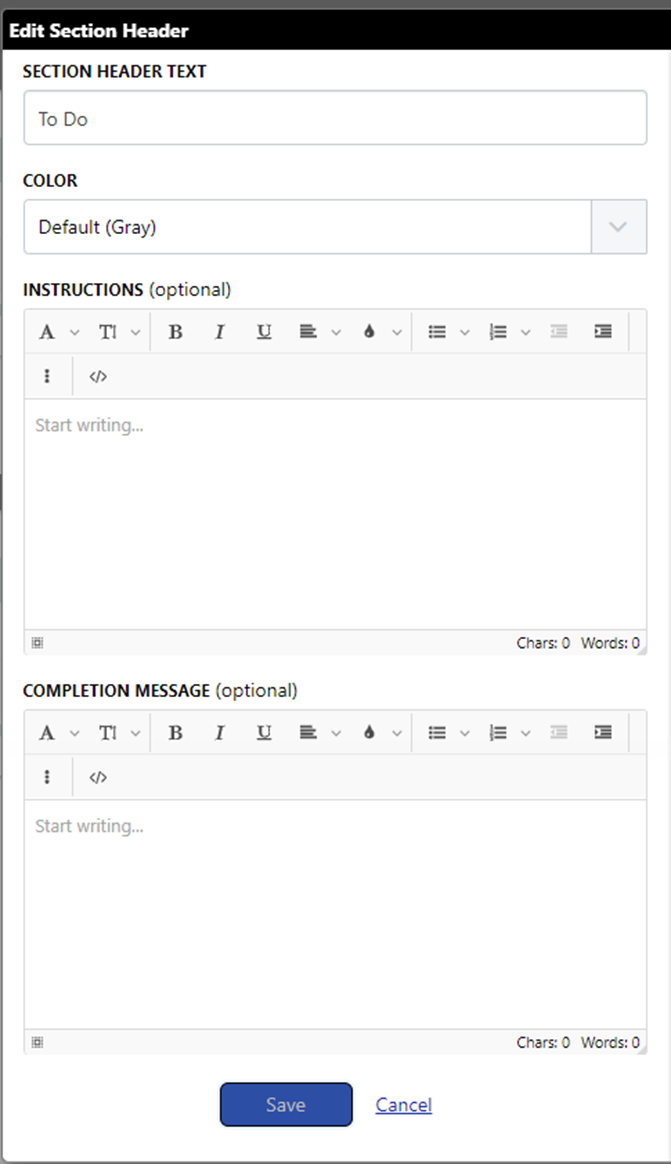
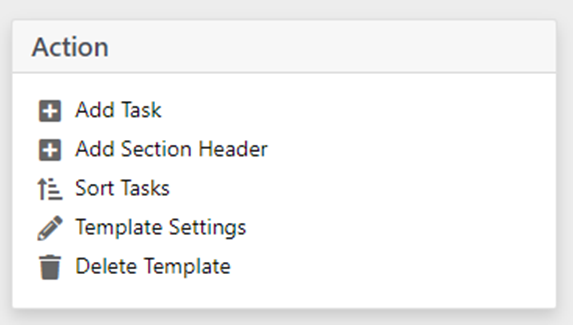
Using the Action menu, you can add unlimited Section Headers with unique names, colors, and messages by clicking Add Section Header. To add tasks that appear under a section header, click Add Task from the Action menu. Note that you can rename the word “task” to suit your situation.
Each task includes:
- Task text
- Task Description (if applicable)
- Designated section
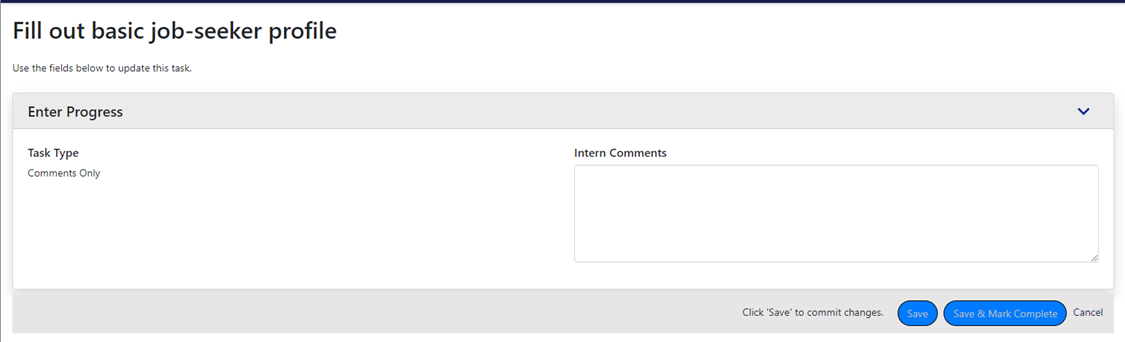
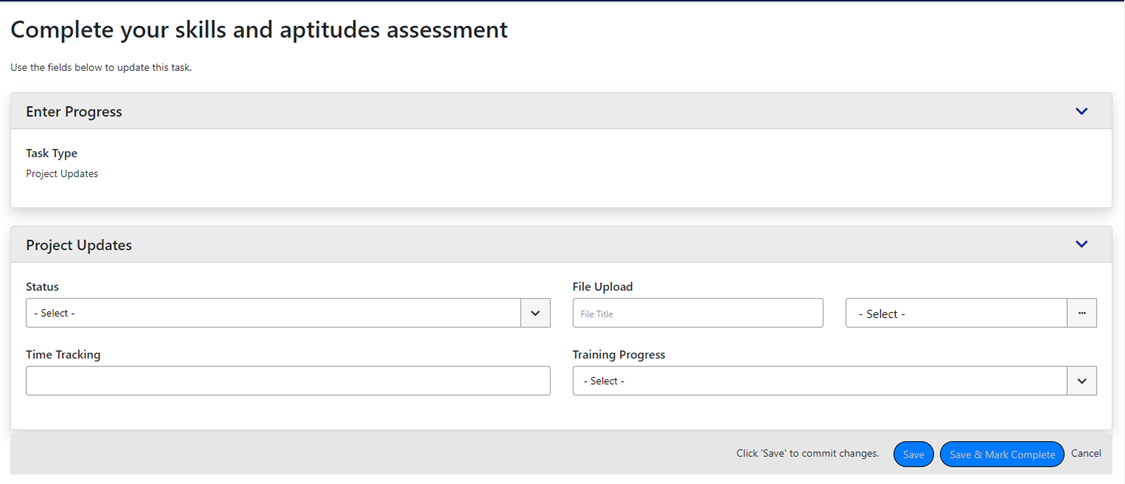
- Task type. This controls the completion options available to students: Comments Only, or Project updates, which displays a customizable progress survey for the task. This survey can include file uploads, picklists, text fields, etc.
- Enter progress. This controls if progress entry is Required or Optional. Please note that this label can be customized
- A URL directing users to an internal or external URL
- The link text that should display for the entered URL
- Due date type (Calendar or Offset)
- Due date, if Calendar, or Offset Start Date (from the template) and Due Date Offset (# of days)
- Reminder date
- Lock. Choosing Yes for the Lock setting prevents students from editing any element of the task
Click Save.

Continue adding tasks and sections headers as desired.

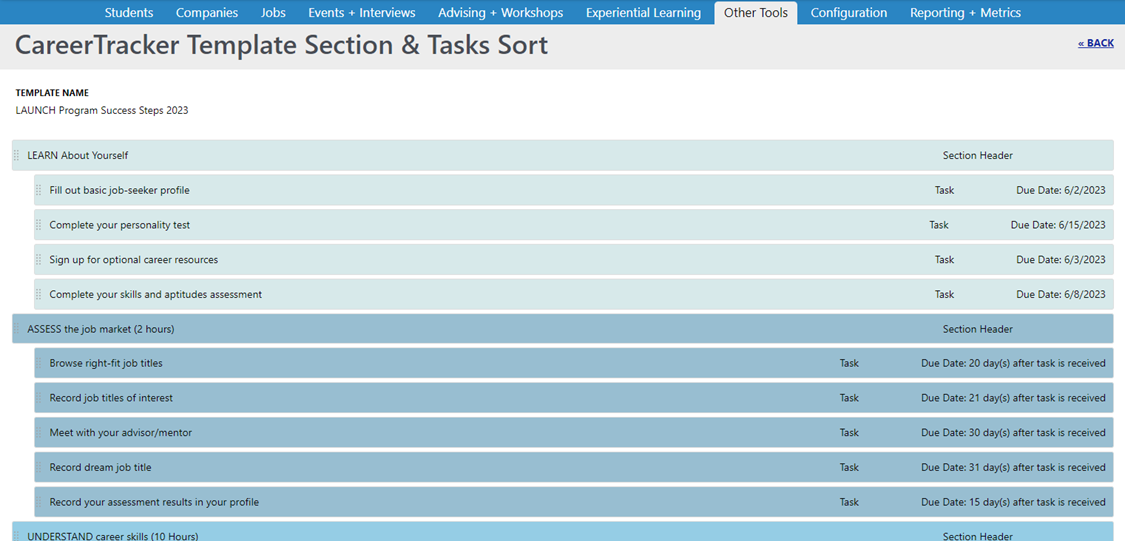
You can click Sort Tasks at any time to adjust the order of tasks by dragging and dropping.
Click Template Settings on the Action menu at any time to edit who can view this template. You can delete a template using the Delete Template action
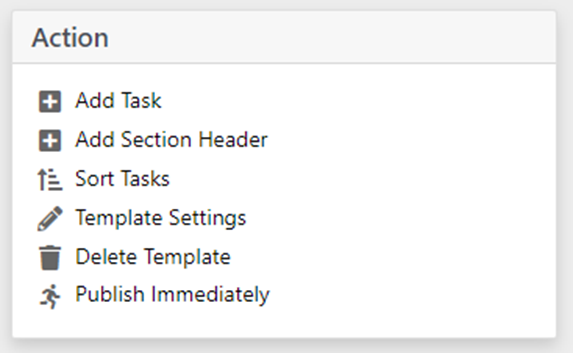
When you're finished, you can either wait for your template to be published on the scheduled date or select Publish Immediately from the Action menu. Until a template is published, it can be found on the Pending tab. Once a template is published, it cannot be edited, so take the time to polish your templates prior to publishing.

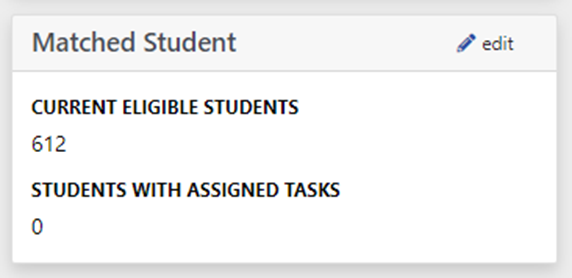
Each template indicates the number of students that match the template, and the number of students that have logged into the system and have had tasks assigned.
To edit a template, select the Edit icon at the right of the Template list.
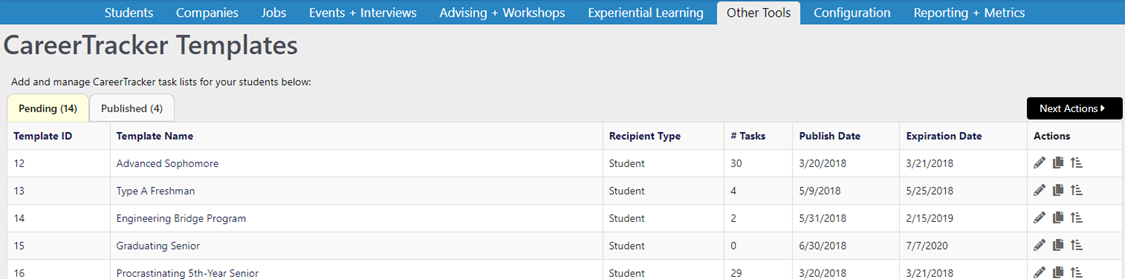
To copy a template, select the Copy icon at the right of the Template list. This enables you to publish the template with new dates.
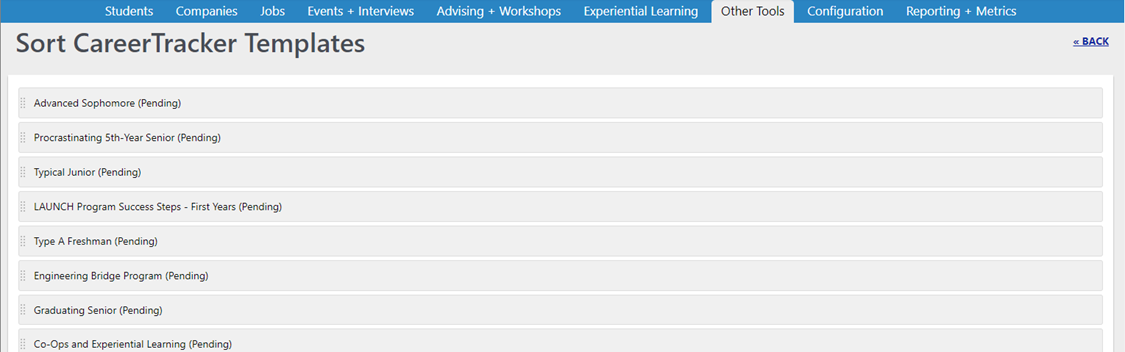
To sort the order in which templates display, select the Sort icon at the right of the template list.
Student Experience
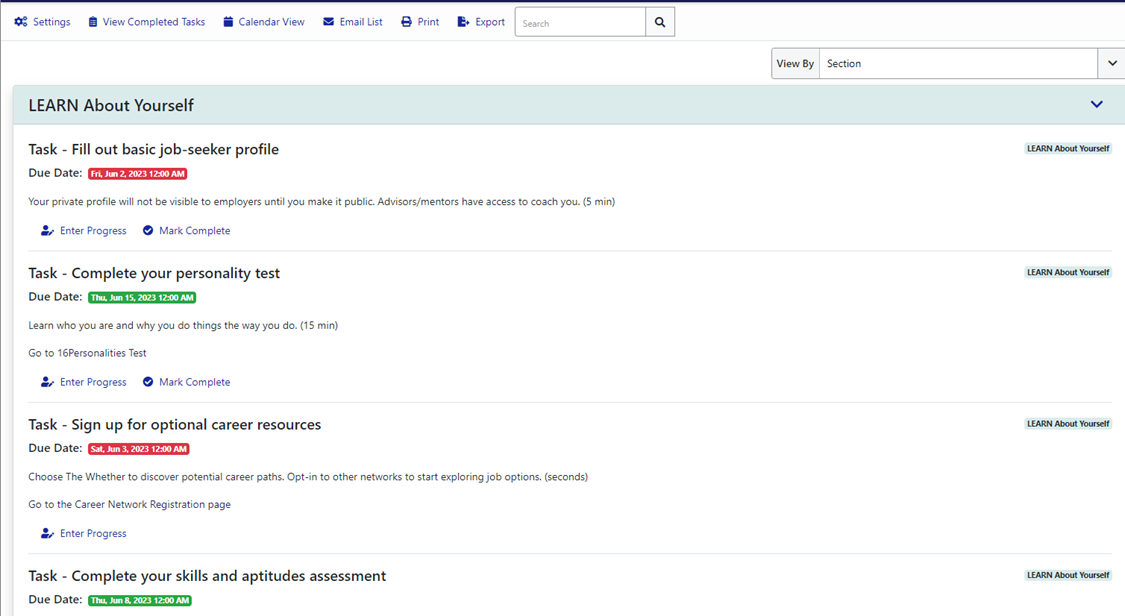
Once a template is published, the students that match your template settings will see their tasks under CareerTracker > My Tasks. By default, tasks display in defined Sections.
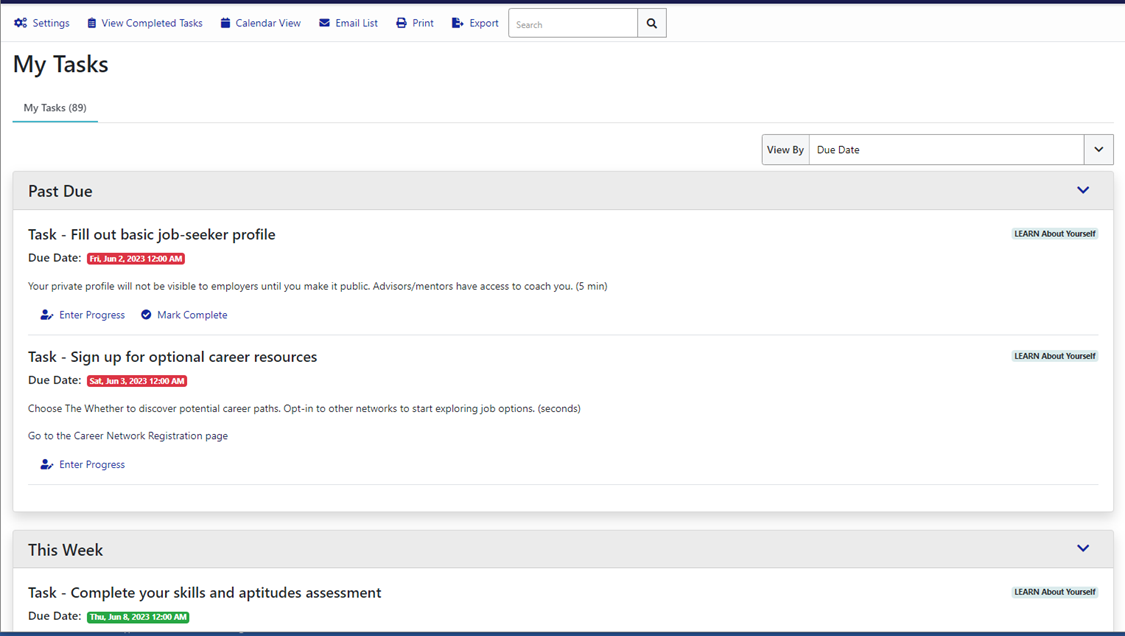
Students can sort their Task list by Due Date or by Task Name using the View By dropdown.
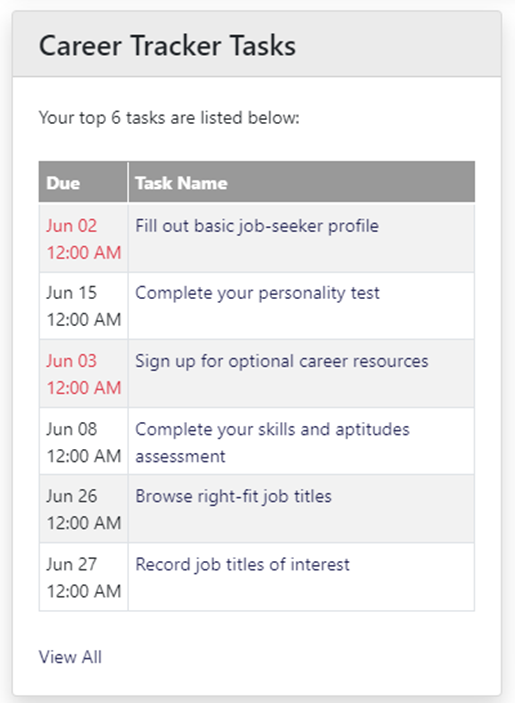
An optional dashboard widget will display up to 6 upcoming tasks.
The task list provides students with a number of permissionable utilities:
- Quick access to completed tasks
- A calendar view of tasks
- Tools to email, print or export the task list
- Quick search

Each task in the task list displays everything you defined for the task:
- Task text
- Task Description (if applicable)
- Designated section
- Any entered URL
- Due date driven by task and template settings
- Defined completion options based on Task Type

Tasks where Task Type is designated as Comments Only provide only a comments field for input when a student clicks Mark Complete
Tasks where Task Type = Project Updates display a customizable survey when the student clicks Mark Complete. Remember that this Task Type can drive variable input fields.
If permissioned on, system integrated tasks/due dates are also included in the task list:

Students will receive email reminders per task based on task settings.
Admin Management and Reporting
You have insight to a student's task list and status from the Profile. Click the Tasks tab for a complete list of tasks, status of each task, and a snapshot of activity against the defined Task list
A number of utilities are available to admins from this page:
- Add a quick task
- Filter by template
- Enter progress on behalf of the student. Note that rules for required fields are not enforced for admin entry
- Edit a task's name or due date
- Delete a task
- Mark a task complete on the student's behalf

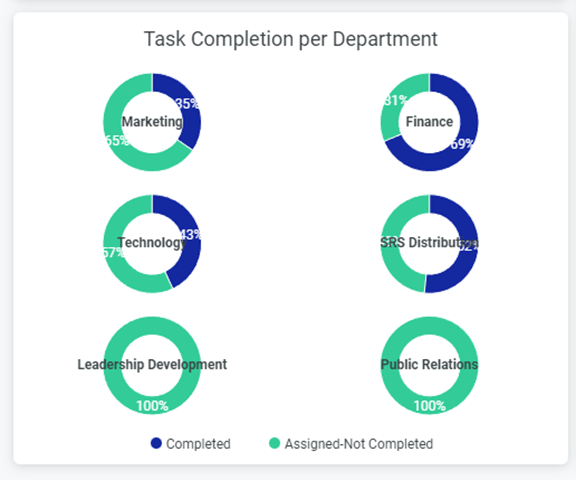
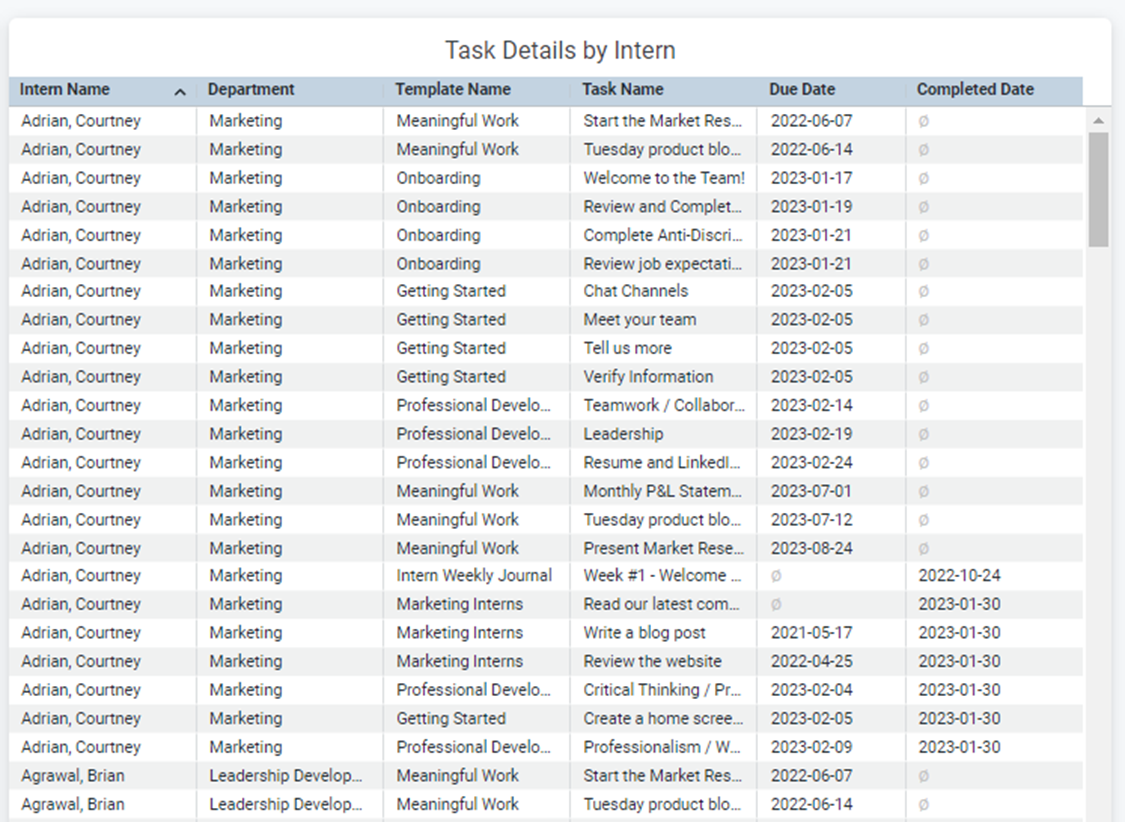
A variety of comprehensive Looker reporting is available, e.g.,
- By template
- By student profile attribute (program, grad date), etc.
- Exception reporting for incomplete tasks


 596.09 KB)
 Add Comment