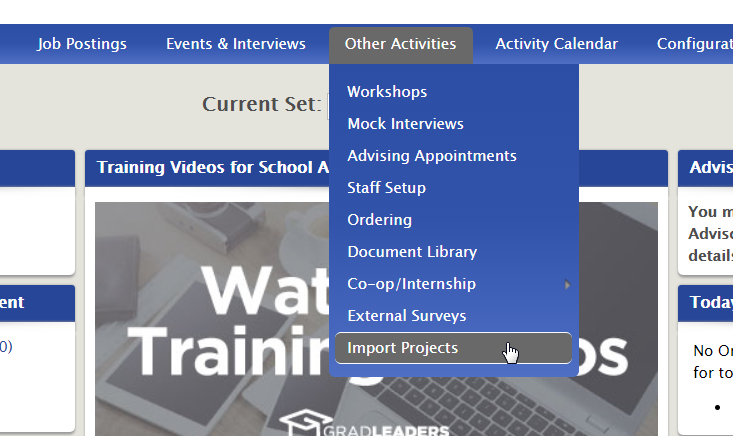
From your Admin Dashboard:
Other Activities > Import Projects (this access can be relocated on the admin menu, per school preference).
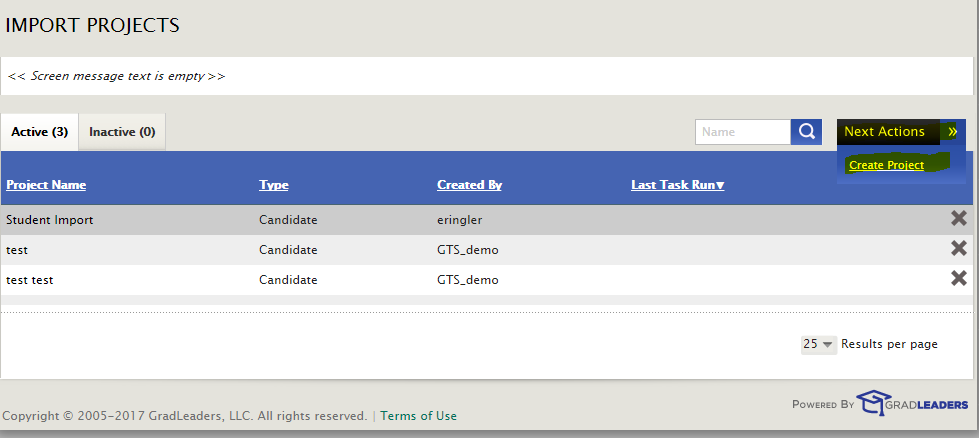
Next Action > Create Project
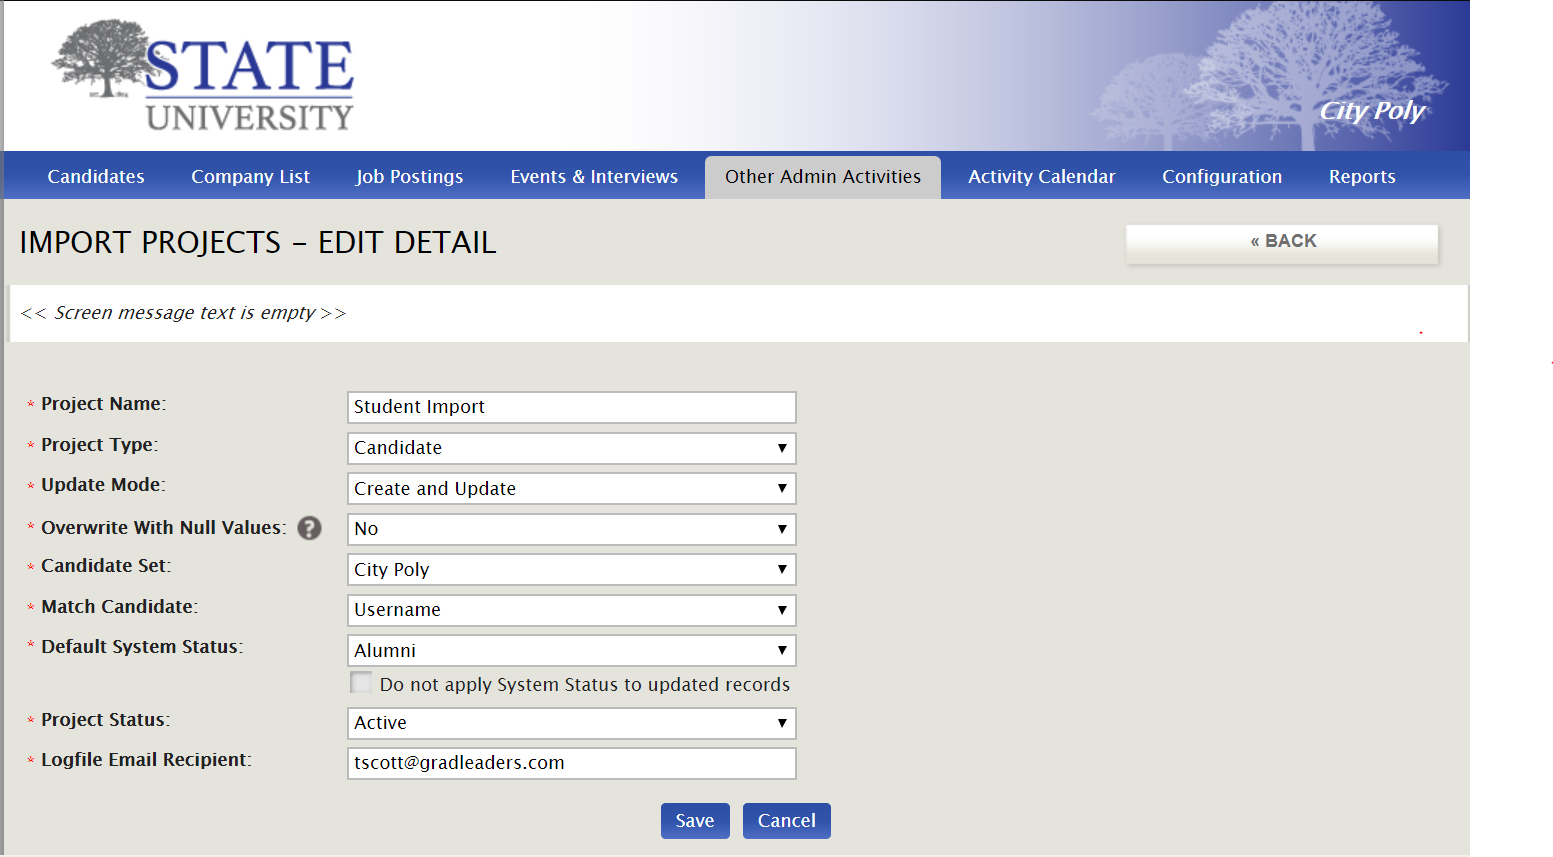
Name: Name of the import project, ex. New Freshman import
Type: Type of field being imported, ex. Candidate or Student
Update Mode:
Update and Create
Create New Only
Update Only
Overwrite with Null Values: Indicates if blank fields in the import file should overwrite that GLCC field upon upload, or leave it as is. Yes – will overwrite GLCC field with blank import field; No – will leave data in that GLCC field unchanged.
Candidate Set: PID or group into which the file is imported
Match Student: For updates, indicates which field from the import file to match to the student record (Email Address, Username, or Student ID).
Default OCR Status/System Status: Active or Inactive
Do not apply OCR Status/System Status to updated records – If Update Mode is Update or Create and Update, the OCR Status will not be changed in rows that are updated.
Project Status: Indicates whether the import project is active or inactive
Deliver Logfile to: Email to send the logfile when completed.
Created by: This will display the admin user who created the project.
Click Save to save entered data and advance to IMPORT PROJECT DETAILS screen.
Import File format:
Accepted formats include .csv, .xls, and .xlsx. For a sample file, click on Download Sample File in the Import File Box.
Columns indicate a data item to match in GLCC. A row is created for each record. The system will automatically map any field where the column name matches a GLCC question exactly. Others can be mapped manually.
Fields in the import file that are to be mapped to "List" questions should use a SEMICOLON delimiter for multiple answers. In addition, TIERED answers should be limited by a PIPE.
For example: Accounting|Other;Consulting;Sales;Finance
For a given row within an import, any validation failure results in all changes for that row being ignored.
For a tiered answer, if a parent answer is directly matched, all of its children will automatically be selected due to the cascading selection nature of how tree/leaf tier lists work in the GLCC UI.
The last column in the import file must contain data for each record. Missing data will result in the import failing. Best practice would be using a questions that is required. For example: username or email address.
IMPORTANT NOTE: For Candidates, the file must contain a first name, last name, email address and username. If one of these question fields does not exist in the student profile, it must be created on the Candidate Survey.
Import from the IMPORT PROJECT DETAILS screen
In the Import File menu to the right, click on Upload.
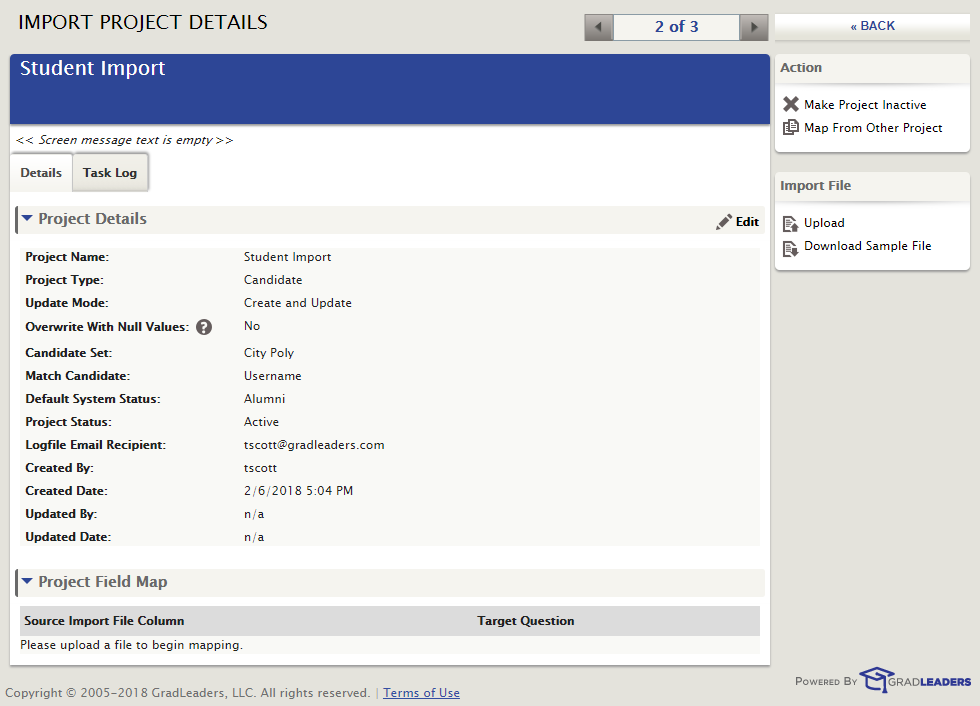
Click on Choose File to browse for the file. Browse for file. Select and click on Open.
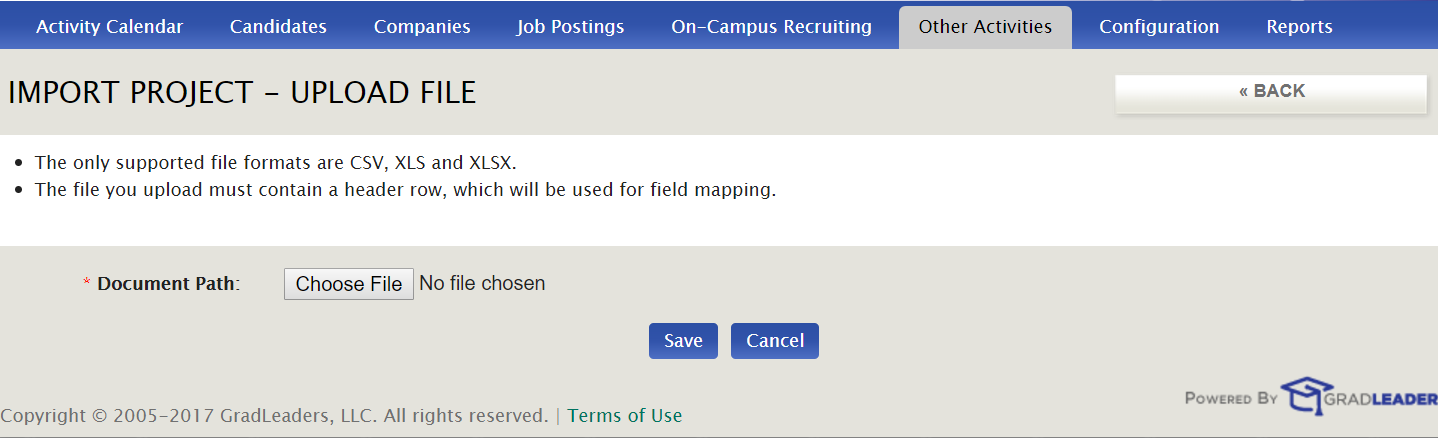
The file name will appear in the Document Path. Click Save.
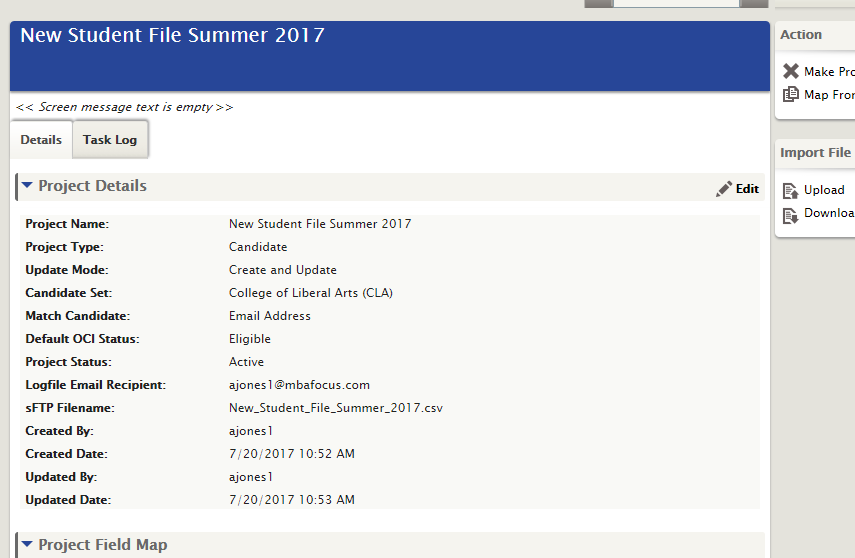
Project Field Map section is now available on the IMPORT PROJECT DETAILS screen.
If the column did not automatically map to a question, use the drop down to select the appropriate question to map the data to.
If a question is not mapped, the data will not be imported.
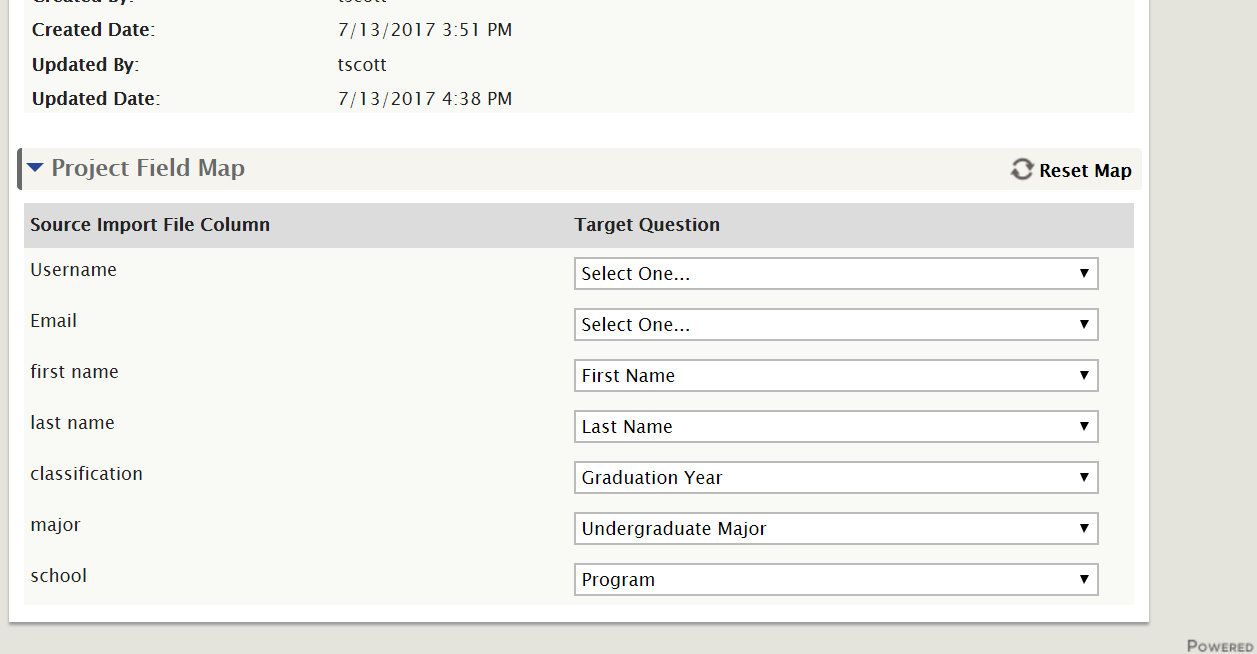
When mapping is completed, click on Test File.
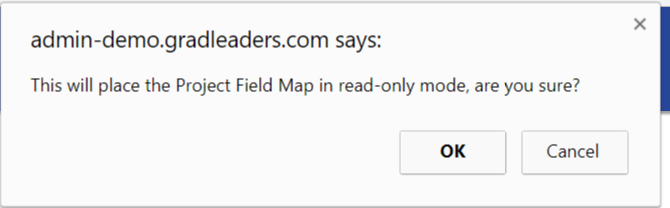
A message will appear asking for confirmation. Click on OK.
If there are any errors, a message will appear explaining the modifications required for a successful import.
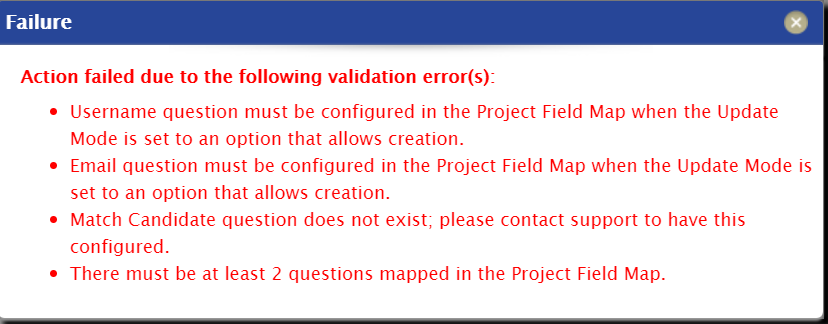
Go back to the original import file and make any modifications.
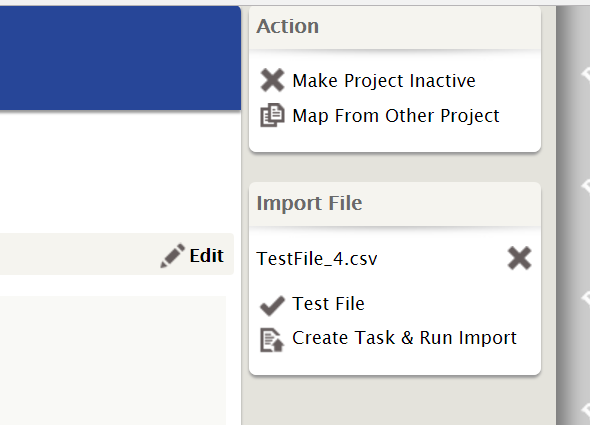
To select the newly modified file, click on the X in the Import file box.
Re-map fields.
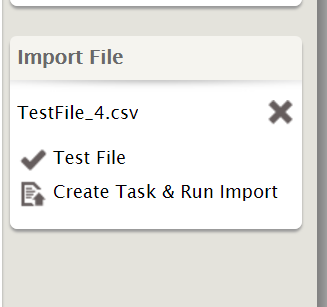
To import the file, click on Create Task & Run Import in the Import File box.
A message will appear:
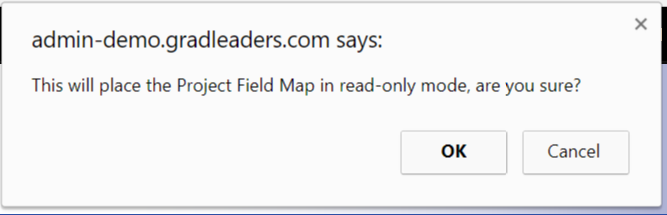
Click OK.
The Schedule Task box appears with two options.
Process Now
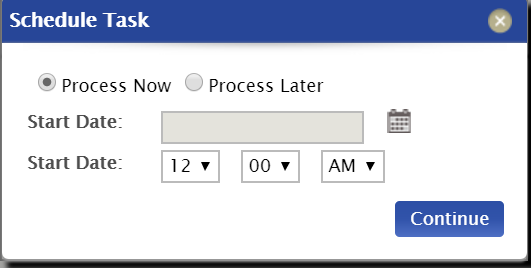
Process Later
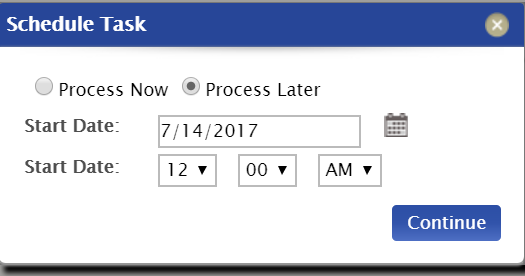
Select date (for process later) and Time. Click Continue.
The IMPORT PROJECT DETAILS screen with the Task Log tab is now visible. The Task Log indicates the import ID, Status, Created by, Start Date, Type, and # of Records. Once processed, the # of records Processed and # of records Skipped statuses will be indicated.
With the custom upload function, there is the option to have automated transfer and processing of upload files. Clients can set up an automated transfer of the file from their server to ours, and as long as a custom upload project exists for it, the file will process automatically after midnight.
Send your set up request to support@gradleaders.com and you will be given access to the secure FTP site. They will also make changes to your school settings to indicate that you would like to use the FTP file transfer option.
You will not need to manually schedule any student uploads because they will be automatically uploaded as part of your process. It is STRONGLY advised that you run a few test uploads to verify that your Custom Project is setup correctly.
The file name for a custom upload sent to the secure FTP site is created from the Project Name. (NOTE: If this sFTP filename does not appear on the Details tab, the system is not configured for FTP upload. Contact support@gradleaders.com to set this up. )
Use the login information provided to upload files to the sFTP site. Use the sFTP Filename exactly as it appears in the Details tab.
The file will be uploaded into GLCC automatically. It may take up to 5 minutes for the file to transfer.
An email message will be sent to the Logfile Email Recipient indicating the status of the transfer.
*Complete/Migrated*
Article ID: 2177
Created On: Aug 2, 2017 at 8:49 AM
Last Updated On: Jun 15, 2022 at 4:32 PM
Authored by: Eddie Thomas
Online URL: http://kbint.gradleaders.com/article.php?id=2177