Overview
The Check-In feature allows career service offices to quickly and accurately track attendance for Workshops, Mock Interviews, OCR, Company Events, and Advising Appointments through GradLeaders Career Center without downloading a local application. This document will review how to set up Activity Mode for an event or workshop in GradLeaders to work with the Check-In program . To review check-in for advising/coaching and interviews and multiple appointments within the career center, see Check-In Kiosk Mode.
Check-In Setup
The program supports any bar code or magnetic reader capable of operating in keyboard emulation mode. Reference the technical information for your reader on how to setup for this mode of operation. This feature supports one particular brand of DYMO nametag printers. Please see the Check-In requirements article for the full list of requirements. In addition to those requirements, there are a couple of recommended best practices for the device that will be running the Check-In program:
- Be sure to disable the screensaver on the device. Even though the Check-in program is a full -screen application, it does not prevent the device's screensaver from starting.
- Have a keyboard and mouse attached to the computer or tablet along with card reader device connected. This will allow admins / students to manually enter their check-in ID if they forget their cards for the event.
Setting Up an Event
Once your school is configured to utilize the Check-In program, all events will be able to utilize the Check-In program. The only difference to the event set up is the addition of the question “Automated Attendance Tracking - Permit Walkins” (exact question text may be different for your school). This question determines if a student who has not signed up for the event would be allowed to swipe their ID and 'walk-in' to the event.
Starting Up Check-In
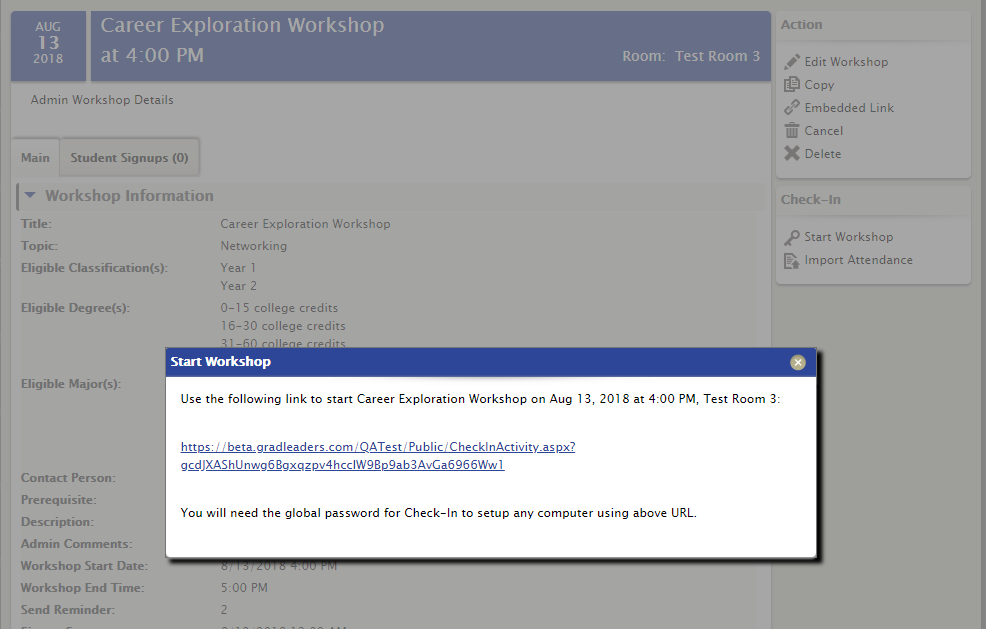
You will need the “Global Password” for the event (a random series of alphanumeric characters). This can be obtained by contacting the Admin in your office or contacting support@gradleaders.com. To start Check-In, go to the details page for the Event or Workshop and click on Start Workshop or Start Company Event in the Check-In section. See screenshot below.
To start Check-In without accessing event or workshop details
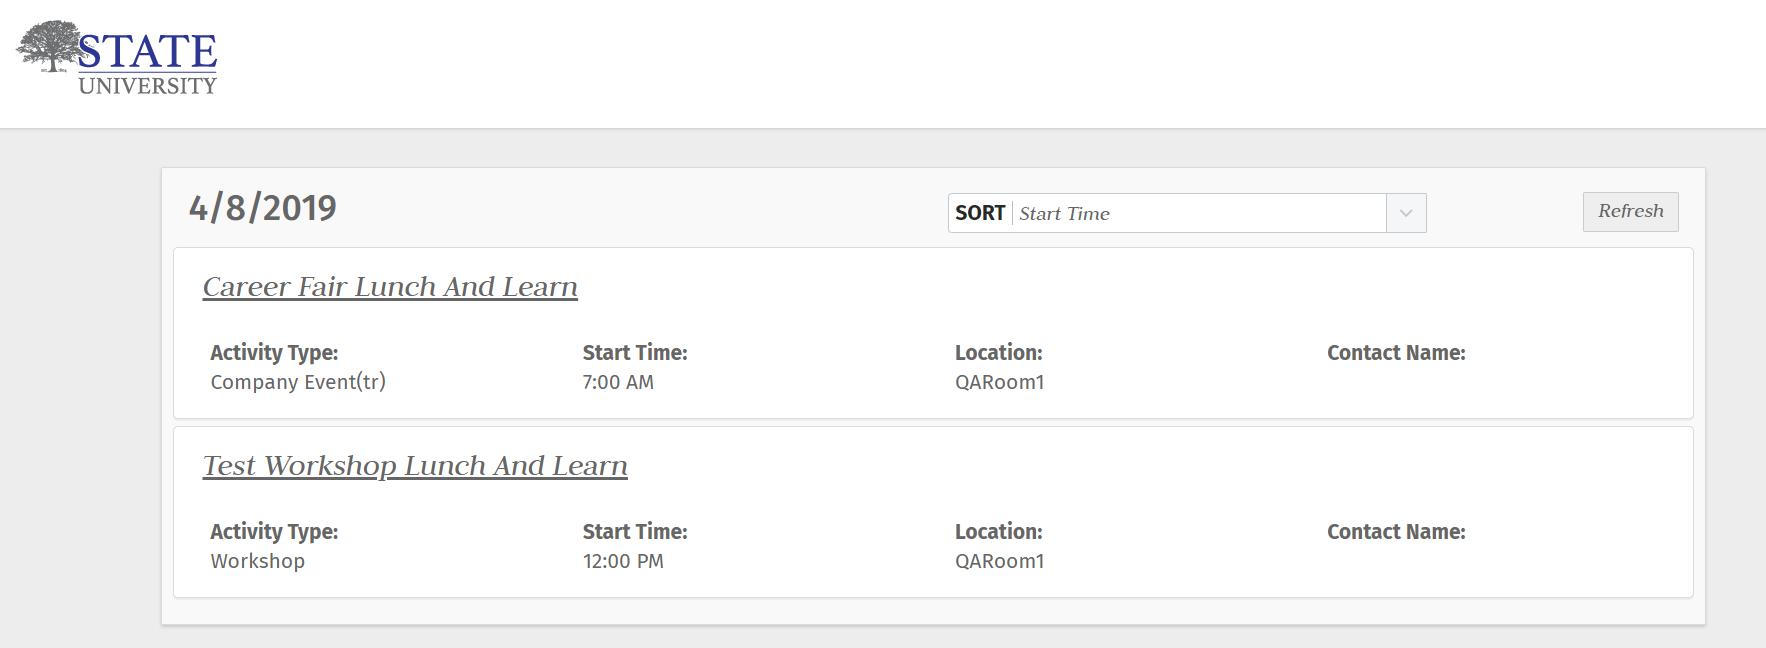
With the May 2019 release, you will be able to access the activity from a list without searching for that particular event or workshop. Instead of accessing the details page for the event or workshop, select Other Admin Activities > Check-In Select Activity.
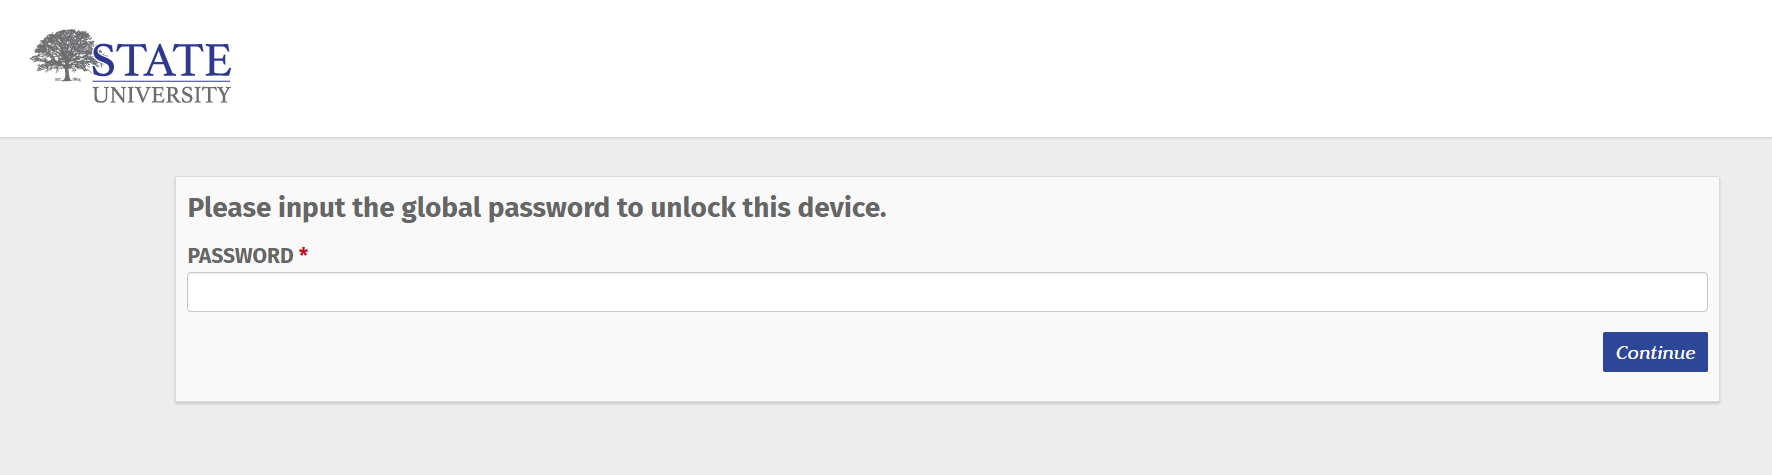
Once you have entered the global password, hit “Continue”.
From the Check-In Select Activity menu, you will be given a list of activities. Click on the correct activity. Enter global password.
This will take you to the Authentication options page.
If accessing from the Event or Workshop Details, you will be directed immediately to the Authentication options page.
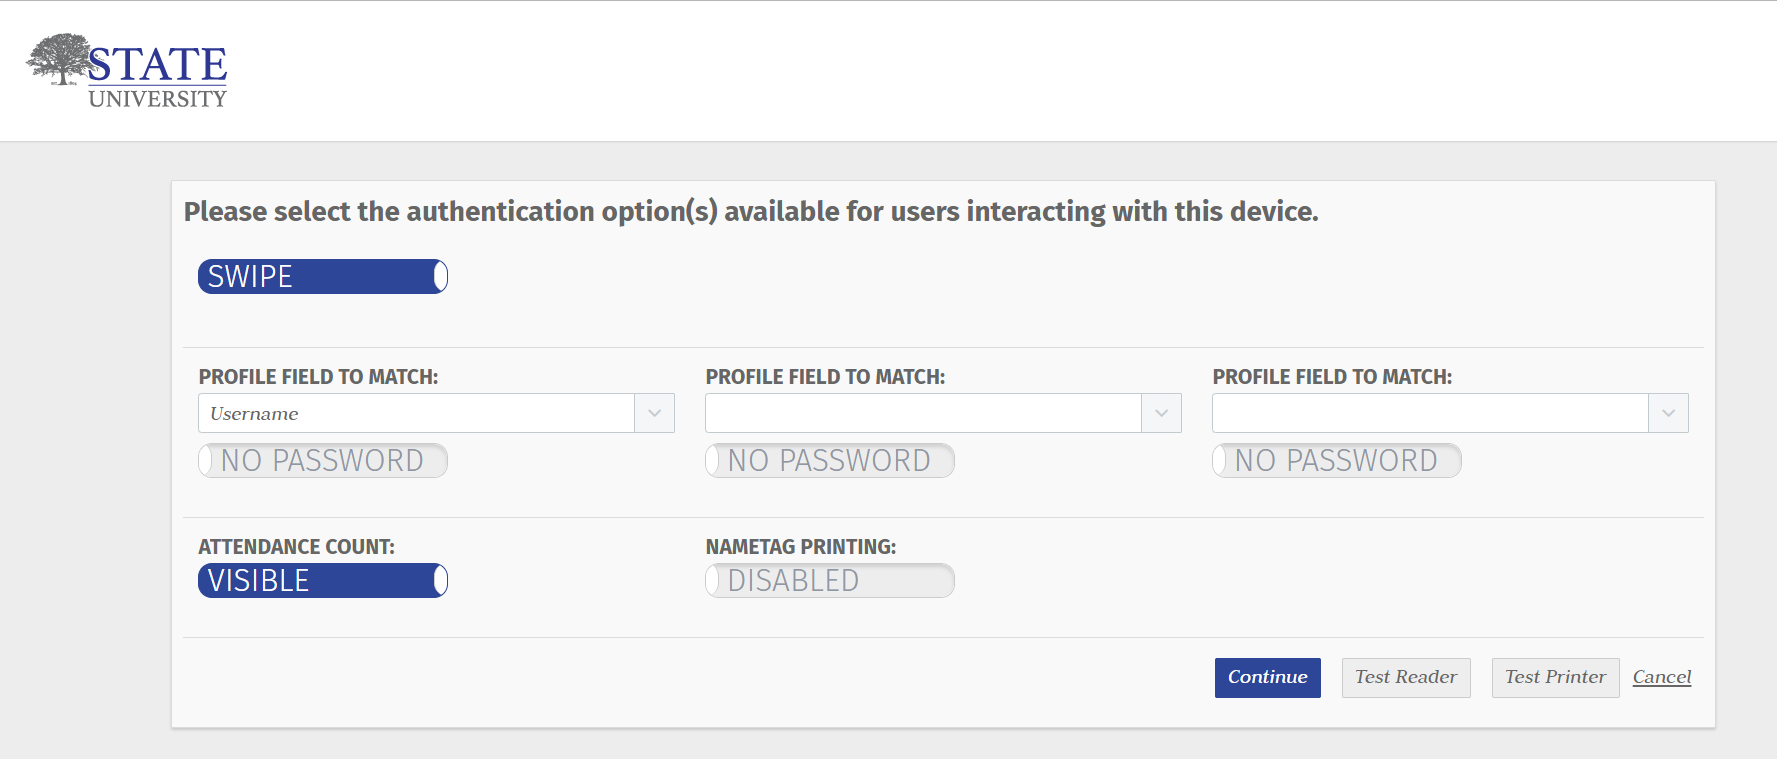
Check-In options for that specific event. Admins will need to select the options accordingly based on how they want students to check-in to the event. See the Check-In Options page below.
- Swipe or No Swipe– this will allow students to swipe their ID cards if desired.
- Profile Field to Match - select Username, Email or Other field to match for identification. Can select up to 3 fields to verify.
- Require Password or No Password – after entering their email address, or other verification field, their password will be required
- Attendance Count Visable or Not Visable -
- Enable or Disable Nametag Printing – this will allow the supported printer to print the student's nametag (Note: All nametag options will be unselectable if you have not installed the necessary printer drivers)
- Test Reader –this is used to see the attendance id we are obtaining from the card based on the track position information provided by the school.
- Test Printer – this is used to test/confirm that the printer will print the nametag.
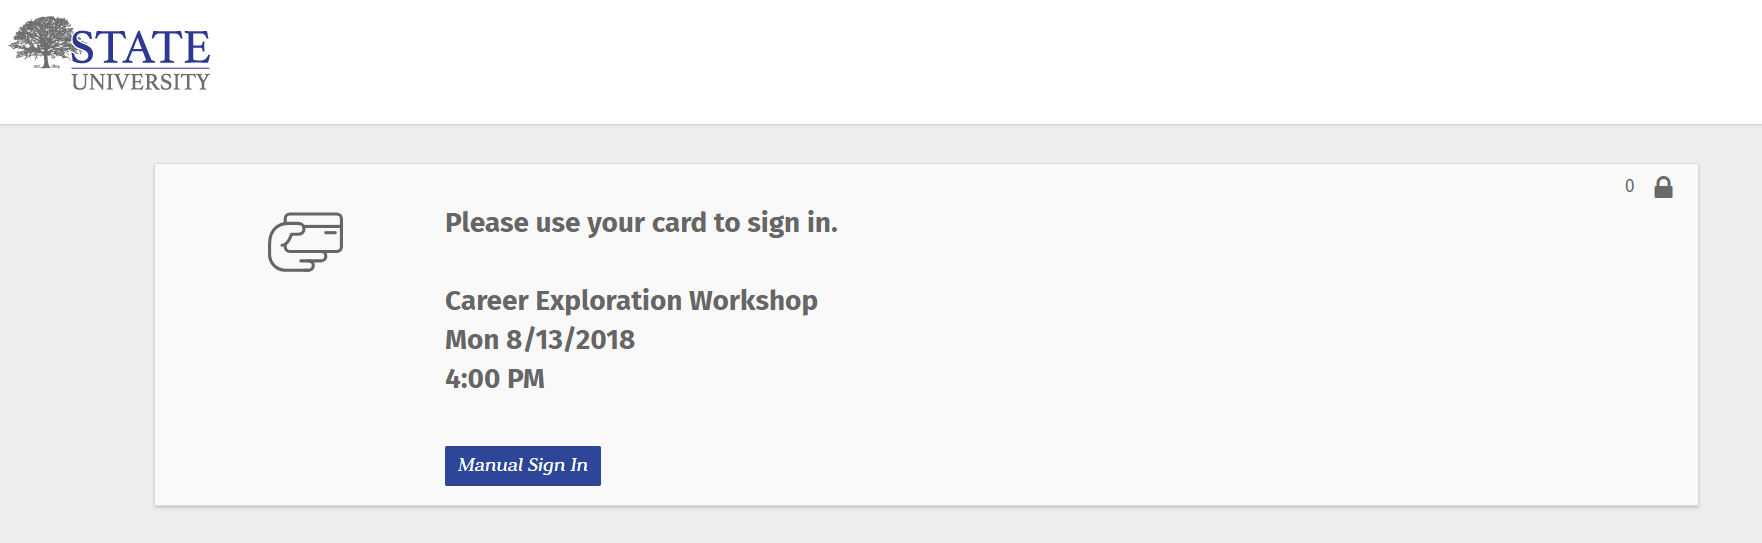
After you have selected the appropriate check-in options for the event, hit “Continue”. You will be directed to the “Check-in” mode for the event. At this point, students will swipe their IDs or Manually Sign In and be checked in to the event. The “Manual Sign In” option will be visible for students who do not have their IDs. As the students check-in to the event, they are marked as attended in real-time within GLCC.
The check-in screen will automatically reset after the set interval but can be manually closed by clicking the ESC key or clicking the X that appears at the top of the screen when hovering.
Below are other helpful articles regarding our Check-In feature:
Using the Check-In program in Kiosk mode
How to print nametags in the Check-In module


 Add Comment